|
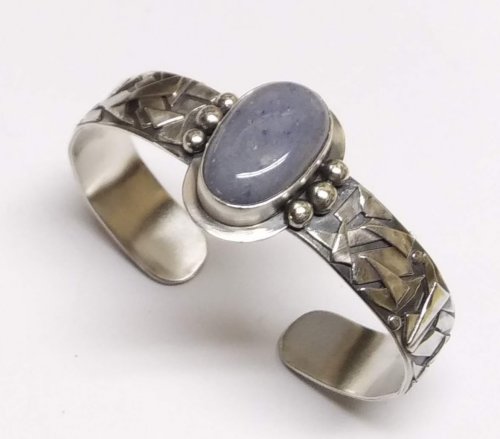
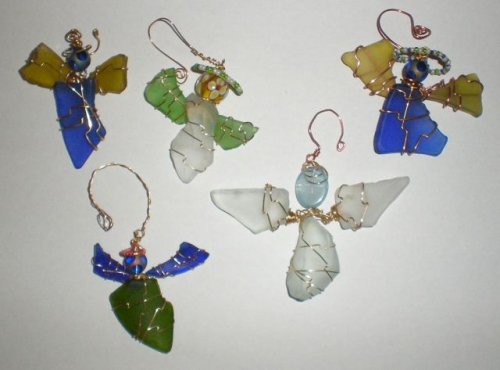
Initial Concept:
Layout cab and beads as desired.
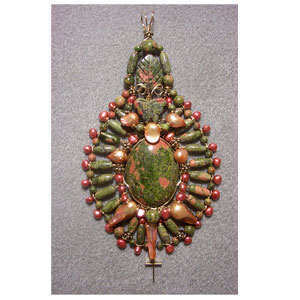
Here I am using unakite with cranberry flat back freshwater and baroque pearls with a gold plate cross. I’ll be using gold plate jump rings, wheel rondelles and headpins. Unakite is my favorite gemstone and combining it with the pearls adds real elegance to this pendant. 
Materials needed:
40X30mm cabochon
Focal beads (gemstone leaf & butterfly)
17X10mm gold plate cross
15” gold 49 strand beading wire
24” gold filled 22 ga square soft wire
14” gold filled 24 ga square hard wire
9” gold filled 24 ga half round half hard wire
8 Baroque pearls
Quantity as needed: (Depends mostly on the size and shape of the baroque pearls)
4, 6 and 8mm gemstone round beads
5X12mm melon beads
5-6mm flat back fresh water pearls
2” gold plate head pins-size .028 & .021 inch
6mm gold plate wheel rondelles
3mm & 4mm gold plate round jump rings
4.5X3mm gold plate oval jump rings
6.5X5mm gold plate oval jump rings
2mm gold plate crimp bead Tools required:
Flush cutter
Flat nose pliers
Round nose pliers
Small 3 step pliers
Needle nose pliers
Bent nose pliers
Blue masking tape
Marking Pen
Burnishing tool
Crimp pliers
Bale making pliers
Ruler 
Rough initial concept
Many changes will be made before this pendant is completed!
|
|
Cab Layout:
Wrap strip of Blue tape around cab and mark center and desired binding areas. Lay this out on ruler and verify balance of markings. |  |
|
Prepare Cab Wires:
Straighten and cut 2 12” pieces of 22 ga square dead soft and 1 14”piece of 24 ga square half hard. Bundle together with 24 ga in center, tape as needed and mark based on cab layout tape. |  |
|
Wrap Wires & Secure Cab:
Using 6 inches 22 ga half-round half-hard wire, do three wraps at bottom center and at both side marks. Fit wires around cab. Bend up wires at the top at the marks. Using remaining wrap wire, loosely bind at top. Using flat nose pliers bend 22 ga square wires by wraps and at the top as needed to secure cab. Use a burnishing tool to slide around the outside of the cab under the 24 gauge wire bringing it out a bit from the cab. This wire will be used to secure surrounding components. Set cab component aside for now. |  |
|
Beading Wire Inner Row:
Starting at the top of the pendant, feed onto 15” of beading wire the pearls and beads which will become the inner row. Wherever there is going to be a melon bead, feed on a 4mm round jump ring. These jump rings will be used to attach this round of pearls and beads and the melon bead components to the 22 ga half hard wire around the cab. Check for fit when half way … use wheel rondelles as needed to adjust the fit.
Duplicate on the other side and feed tail back through the top baroque pearl (enlarging hole as necessary). | 
|
|
Headpins & Beads:
Feed pearls and melon beads onto .021” headpins and arrange based on location of 4mm jump rings. Place 4mm beads between sets. Arrange pearls and beads on protruding beading wire to form the proposed top around the leaf bead. Using smallest step of 3 step pliers and .028” headpins make bead links with eye loops of all beads that are between the melon components. Remove melon bead from headpin, slide on one end of one bead link, then one end of the next bead link. Replace the melon bead. Using round nose pliers and then needle nose and bent nose pliers, make a wrap loop at the top of the melon, with three wraps. This forms the melon component. Continue to join the melon components with the bead links, starting at the bottom next to the cross component (see below for cross component) and work to the top of the pendant. The top bead link will contain both a 6mm and a 4mm bead and will be utilized to join the melon round of beads with the beads surrounding the leaf at the top of the pendant. | 

|
|
Cross Component:
The center bottom bead wrap is different than the others in that there are two 4mm beads with eye loops on opposing ends and a twisted ‘V’ shaped between them which holds the cross and will rest behind the long baroque pearl. Bend out the sides of the ‘V’ and then give a turn to the ‘V’ adjusting as necessary so it sits behind the long baroque pearl. Make a bead link through the top of the long Baroque pearl. Add these loops above the melon beads on the headpins and top with freshwater pearls prior to the final bead wrap. For the melon components on either side of this cross set, add one wheel prior to adding the melon and then do the final bead wrap. | 


|
|
Complete the Outer Round of Components:
Join the cross component with the side components of the second round of beads – the rest of the melon bead components . |  |
|
Connecting Components:
Loosen the beading wire temporarily. Using the jump rings initially placed on the beading wire, connect the Outer Round Component, the Inner Round Component and the 24 ga wire around the cab. Note: Adjustments need to be made for proper fit and drape of the pendant. Some of the 4mm jump rings need to be exchanged for oval jump rings, either 4.5X3mm or 6.5X5mm. Artistic discretion must be utilized. The top two wheel rondelles have been removed since they are not needed to complete the connection. | 

|
|
Wrap top 6 wires:
Loosen the beading wire so the top baroque pearl can be moved out of the way temporarily. Align the six square wires just above the cab and tightly wrap with remaining 3” of 24 ga half round half hard wire. Do not cut off top tail. It will be fed up through the next surprise component. Tighten the beading wire and move baroque pearl back tight against the wraps. |  |
|
Butterfly added:
As with all projects that I make, I let the piece develop itself – through prayer and patience. I am thrilled with this latest addition to this piece – totally unthought of initially. The cross is not the end of the story of salvation. The butterfly is a symbol of the resurrection of our Lord, Jesus Christ. Going from the cross at the bottom, up through all the elements of this world, the butterfly bursts forth at the top. Jesus died for us, but even more He rose again and lives for us today! This butterfly is fed above the central baroque pearl onto the 1/2 round 1/2 hard wrap wire. |  |
|
Wrap wires:
Align the two front 22 ga wires and the two center 24 ga wires behind the butterfly giving it a ‘platform’. Wrap the 1/2 round 1/2 hard wire once around these four wires just above the top of the butterfly. Clip the wrap wire and tuck the end into the hole at the top of the butterfly. Bring the front two wires sharply forward just above the wraps. Then bend them straight up again at the front of the butterfly. For now, cut these wires 2” from the top of the butterfly. These will become the ‘feelers’ of the butterfly. | 
Starting Top: |
|
Feed 3mm round jump rings onto beading wire as spacers, and to carry on the bead, ring, bead look. Then feed on beads and baroque pearls. Bringing the back 22 ga wires up slip wheel rondelles onto this wire and the beading wire.
Next, feed the double bead links onto the beading wire and the 22 ga wire. Now feed the beading wire down through the wheel rondelles at the back of the pendant. Feed a wheel rondelle onto the 24 ga wires above the butterfly and add the focal leaf onto these two wires. Above the leaf add an 8mm round bead. After adding jump rings, round beads and melons onto the 22 ga wires, cross the wires over the 8mm bead and then bring them straight up. Place a wheel rondelle on the four wires at the top of the 8mm bead. Bend the 24 ga wires down the back of the pendant. | 

|
|
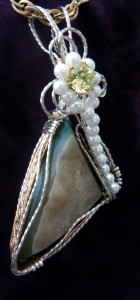
Finishing Top:
On the back side, behind the butterfly, bring the two ends of the beading wire together and secure with a crimp bead. Clip ends leaving enough tail to tuck in behind the wires. Next, finish the 24 ga wires by bending one at a right angle at the base of the 8mm bead. Wrap this wire around the bead at the bottom and tuck the end in the back. Trim the other 24ga wire so there is enough to curl up and in at the base of the 8mm bead. Clip the butterfly ‘feeler’ wires and curl outward as desired. |  |
|
Rub out top wires to add extra strength. Bend one forward and the other back. Using the largest mandrel on the bale making pliers, curl the forward one back and the back one forward. This opposing curling adds strength and security. With the very tip of round nose pliers, curl ends in. Spread loops as desired. |  |
|