


- NEW DVD Series – Stone Setting with Bezels
- Tube Set Charm by Kim St. Jean
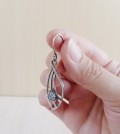
- Prong Basket Pendant by Kim St. Jean
- NEW DVD Series – Stone Setting with Cold Connections
- New DVD Series – Stone Setting with Wire
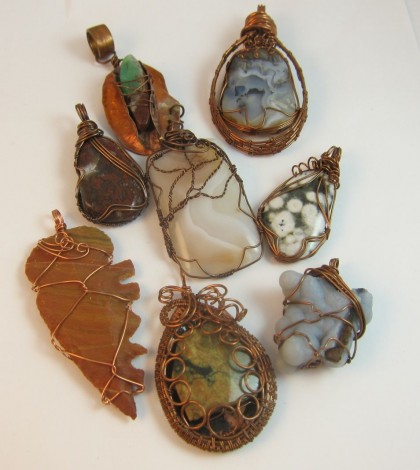
- NEW DVD Series: Introduction to Stone Setting by Kim St. Jean
- Featured Tool: Bracelet Bending Plier
- NEW Dvd by Eva Sherman
- Fun, Fast Fold Forming DVD Series
- Double Band Ear Cuff from Alex Simkin
Wire-Sculpture Articles
-

See Yourself as a Creative Thinker-Part IV By Karen Meador, PhD
Wire Jewelry Article for September 27th, 2017 If you missed Part 1, Part 2, or...
-
See Yourself as a Creative Thinker-Part III By Karen Meador, PhD
Wire Jewelry Article for September 20th, 2017 If you missed Part 1 and Part 2...
-

See Yourself as a Creative Thinker-Part II By Karen Meador, PhD
Wire Jewelry Article for September 13th, 2017 If you missed Part 1 of this series, you...
More Wire-Sculpture Articles News
-
 See Yourself as a Creative Thinker By Karen Meador PhD
Wire Jewelry Article for September 6th, 2017 This is the first in a series...
- Posted September 6, 2017
-
 Kitchen Patinas By Jen VanBenschoten
Wire Jewelry Article for August 30th, 2017 Have you ever wanted to add a...
- Posted August 30, 2017
-
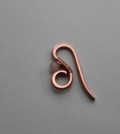
 Easy Ear Wire are Always an Option By Jennifer VanBenschoten
Wire Jewelry Article for August 23rd, 2017 No more excuses when it comes to...
- Posted August 23, 2017
-
 The 24-piece Dapping Punch Set is not just for dapping!!
by Judy Ellis, Wirejewelry.com Wire Jewelry Tip for August 18th, 2017 The 24-piece Dapping...
- Posted August 18, 2017
-
 Unconventional Tools 101.1 By Judy Bennett
Wire Jewelry Article for August 16th, 2017 I am a metalsmith, wire, and metal...
- Posted August 16, 2017
-
 Making Perfect Wire Loops by Jennifer VanBenschoten
by Judy Ellis, Wirejewelry.com Wire Jewelry Tip for August 15th, 2017 Making Perfect Wire...
- Posted August 15, 2017
-
 Free Pattern: Moonstone Woven Wire Bangle by Delilah
by Judy Ellis, Wirejewelry.com Wire Jewelry Pattern for August 14th, 2017 Moonstone Woven Wire...
- Posted August 14, 2017
-
 How to oxidize your wire and jewelry without liver of sulfur By Delilah
by Judy Ellis, Wirejewelry.com Wire Jewelry Tip for August 11th, 2017 How to oxidize...
- Posted August 11, 2017
-
 Free Pattern: Embellished Hook Clasp by Abby Hook
by Judy Ellis, Wirejewelry.com Wire Jewelry Pattern for August 10th, 2017 Embellished Hook Clasp...
- Posted August 10, 2017
-
 Combine Chain Maille with your Other Crafts by Marilyn Gardiner
Wire Jewelry Article for August 9th, 2017 Many people who make chain maille jewelry...
- Posted August 9, 2017
-
 Making Balled Ear Wires By Oksana Trukhan
by Judy Ellis, Wirejewelry.com Wire Jewelry Tip for August 8th, 2017 Making Balled Ear...
- Posted August 8, 2017
-
 Free Pattern: Smile Cluster Necklace by Karen Meador
by Judy Ellis, Wirejewelry.com Wire Jewelry Pattern for August 7th, 2017 Smile Cluster Necklace...
- Posted August 7, 2017
-
 Get to Know Your Hand Tools – Tube-Cutting Jig By Helen I. Driggs
by Judy Ellis, Wirejewelry.com Wire Jewelry Tip for August 4th, 2017 Get to Know...
- Posted August 4, 2017


Wire Jewelry Ideas
-
 See Yourself as a Creative Thinker-Part IV By Karen Meador, PhD
Wire Jewelry Article for September 27th, 2017 If...
- September 27, 2017
-
 See Yourself as a Creative Thinker-Part III By Karen Meador, PhD
Wire Jewelry Article for September 20th, 2017 If...
- September 20, 2017
-
 See Yourself as a Creative Thinker-Part II By Karen Meador, PhD
Wire Jewelry Article for September 13th, 2017 If you...
- September 13, 2017
-
See Yourself as a Creative Thinker By Karen Meador PhD
Wire Jewelry Article for September 6th, 2017 This is...
- September 6, 2017

Design & Inspiration
-
Free Pattern: Smile Cluster Necklace by Karen Meador
by Judy Ellis, Wirejewelry.com Wire Jewelry Pattern for August...
- August 7, 2017
-
 Free Pattern: Long crystal round maille earrings by Kylie Jones
by Judy Ellis, Wirejewelry.com Wire Jewelry Pattern for August...
- August 3, 2017
-
 Free Pattern: Stone Twist Wrap by Karen Meador
by Judy Ellis, Wirejewelry.com Wire Jewelry Pattern for July...
- July 31, 2017
-
 Free Pattern: Floating Bead Earrings By Kimberly Newman
by Judy Ellis, Wirejewelry.com Wire Jewelry Pattern for July...
- July 27, 2017
Featured Tools
-
Get to Know Your Hand Tools – Tube-Cutting Jig By Helen I. Driggs
by Judy Ellis, Wirejewelry.com Wire Jewelry Tip for August...
- August 4, 2017
-
 Wire Jewelry Video: Using Punch Pliers by Judy Freyer Thompson
by Judy Ellis, Wirejewelry.com Wire Jewelry Tip for August...
- August 2, 2017
-
 Wire Jewelry Video: Aligning a Hole Punch by Judy Freyer Thompson
by Judy Ellis, Wirejewelry.com Wire Jewelry Tip for July...
- July 26, 2017
-
 Get to Know Your Hand Tools – Wire Cutters – Helen I. Driggs
by Judy Ellis, Wirejewelry.com Wire Jewelry Tip for July...
- July 25, 2017